
How to change an alternator on a modern vehicle.
You’re out driving on a rainy evening. You come to stop at a stoplight and the lights go a little bit dim. When you start up again the lights brighten and things carry on as normal. This is pretty much the symptom of a faulty alternator or one that is not working to its specified output. This is a fairly common problem that develops after maybe six, eight, or ten years of use. Fortunately it is easy to correct. The first step is to purchase a replacement alternator. Generally speaking, a new alternator is priced prohibitively high.
However, a rebuilt is normally available at a modest cost and generally requires a core deposit, which is refundable when you return the old alternator to the parts dealer. To get the correct alternator the first time you, need to go to the parts dealer with your make, model, and your VIN number, and probably also the engine size. These are all factors that will influence exactly the size, capacity, and configuration of the alternator that you need.
Once you purchase the alternator, the very first step is to hold it next to the one that’s in the vehicle, and match it to make sure that everything is identical. This will save you a lot of trouble down the road. Now that you have your new alternator in hand, or rebuilt alternator the case may be, there are several things that you will need before you begin your project. The first is the correct tools. Since you do not know whether the nuts and bolts are metric or SAE/ inch, you should have a socket set and a combination wrench set that are both metric and inch so that you have the correct tool for any contingency. In addition, depending on the vehicle, you might need a belt tensioning tool, and you certainly will need a pry bar, particularly for an older alternator. There are many pry bars on the market from several manufacturers such as: Craftsman, Stanley, Tekton, and Tech Team https://techteamproducts.com/ . We thought the Tech Team set https://www.amazon.com/Mechanics-Prybars-Chisel-Angled-Rolling-Head/dp/B07CSBZ4ZM/ref=sr_1_11?s=power-hand-tools&ie=UTF8&qid=1540409708&sr=1-11&keywords=pry+bar+set was the best overall value and provided excellent leverage and ease of use. Beyond that, it’s a good idea to have safety glasses, and also to wear nitrile protective gloves. One other thing that you may not think of, but comes in very handy, is a digital camera or a cell phone camera. Take a picture of the alternator that’s currently in the vehicle so that you know exactly where each wire goes, and how it fits into the overall scheme of things. This will save you a lot of trouble when you do reassembly.
Now that you have your tools and everything else gathered and your replacement alternator, it’s time to identify exactly how you’re going to proceed. For an older vehicle the alternator will be driven by a black V belt, and the alternator will be connected to the engine by a single bolt that goes to one hole in the bottom of it, and a second bolt that will ride inside a long curved slot on a bracket. For this type of installation you definitely need a pry bar https://www.amazon.com/Mechanics-Prybars-Chisel-Angled-Rolling-Head/dp/B07CSBZ4ZM/ref=sr_1_11?s=power-hand-tools&ie=UTF8&qid=1540409708&sr=1-11&keywords=pry+bar+set so that you can tense the belt correctly when installation is complete.
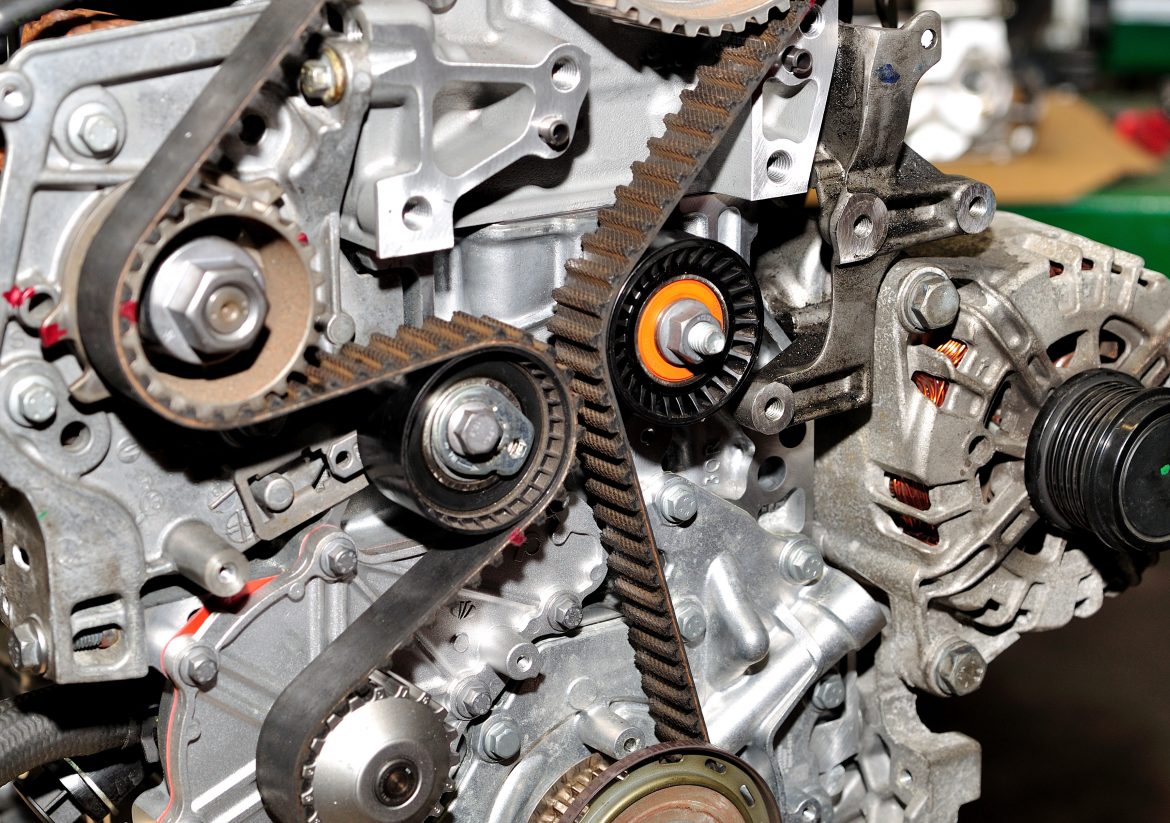
The other situation you will encounter, especially on new vehicles, is a serpentine belt. This is typically 1 inch to 1 ¼ inch wide, has numerous grooves running along the inside perimeter, and very often is a color other than black. The grooves on the inside perimeter of the belt engage grooves on the pulley of the alternator and the other accessories which it drives. These belts are called serpentine for a very good reason. If you look at the front of the engine and see how the belt runs, it indeed runs in a serpentine manner, driving numerous accessories. Since the course of the belt is convoluted, a very good idea once you remove the alternator is to use a bungee cord, or a cable tie, or even a piece of string to hold the belt in position so it does not disengage from the other accessories that it drives.
We’ll assume that we’re changing the alternator on a modern vehicle with a serpentine belt. This particular belt is held tense by a special tensioning pulley. In order to relieve the tension on this pulley and the belt, it’s necessary to use the belt tensioning tool. This is a device that engages a hub on the pulley, and by operating the tool, you reduce the tension on the belt, and once you’ve done that, you can relieve the belt from the pulley on the alternator. This is the point where you want to tie the belt in place so it does not disengage.
Having gone this far the next step is to remove the electrical connectors on the alternator. These could be one of two different types. It could be a simple threaded post with a nut that holds a wire with the eye on the end of it, which is pretty typical. And then in addition to that, or in place of that, many times there will be a square plastic electrical connection block that needs to be disengaged. Typically there will be two clasps on this particular device, which need to be slightly relieved, and then the plug can be gently pulled back and disengaged from the terminal block on the alternator. Now that you’ve disconnected the belt and you’ve disconnected the wires, it’s simply a matter of using your tools to turn the connecting bolt counterclockwise until it’s completely unthreaded and removed, and the alternator can now be lifted out of the engine bay.
Since you have hopefully already confirmed that the replacement alternator is identical, you can now put the replacement alternator into the same location. Thread the connecting bolts in place, and properly secure the alternator using the manufacturer’s recommended torque specifications for tightening the attaching bolt. At this point you can reconnect the electrical connections, and you’ll probably be very glad that you took a photo. Once this is complete, it’s time to re-engage the belt. Engage the belt tensioning pulley with the belt tensioning tool, and relieve tension so that the belt is free enough so you can place it over the pulley on the alternator. Now slowly release pressure on the belt tensioning tool, and the belt will automatically fall into place on the alternator, and the other devices that it drives.
The next step is to start the engine and make sure that the belt is functioning correctly, and has not been off set on any of the pulleys, and if everything is running smoothly your job is done. You have successfully completed the replacement of the faulty alternator and you can return the faulty alternator to the parts dealer to collect your deposit.