
How to fix a tear in ductwork
How to fix a tear in ductwork
I’m going to explain how you can repair a hole in flexible ductwork. If you have a piece of ductwork that has a hole in it, where you’re losing air or heat that’s coming out, which makes a weak air stream coming out of the vent. What you can do, as long as you have enough ductwork, is cut out a piece, and then splice together the two good ends of the ductwork. That way there is no longer a hole. First I’m going to cut a whole 6-8 inch piece out. Once I’ve done that, then I’m going to take a connector, and connect the two good ends together and things should be fine.
There’s this 3” hole that’s right in the ductwork, so I’m going to go about maybe 2-3 inches on each side, and take a pair of aviation snips to cut through the actual installation itself, and basically cut out the hole. You may need a pair of wire cutters to cut the piece of wire that’s actually inside the ductwork. The hole was right in the middle, so what I want to do is remove the whole piece. With my aviation snips I’m going to cut that out.
Now that that piece is cut, I have to cut the other side, and I’m going to snip the wire. You want to make sure that you have a solid piece of ductwork with no holes in it where you cut it out. Now that that’s all cut, what I want to do is take my other two pieces that are going on the top of my connector and I’m going to be connecting the two ends.
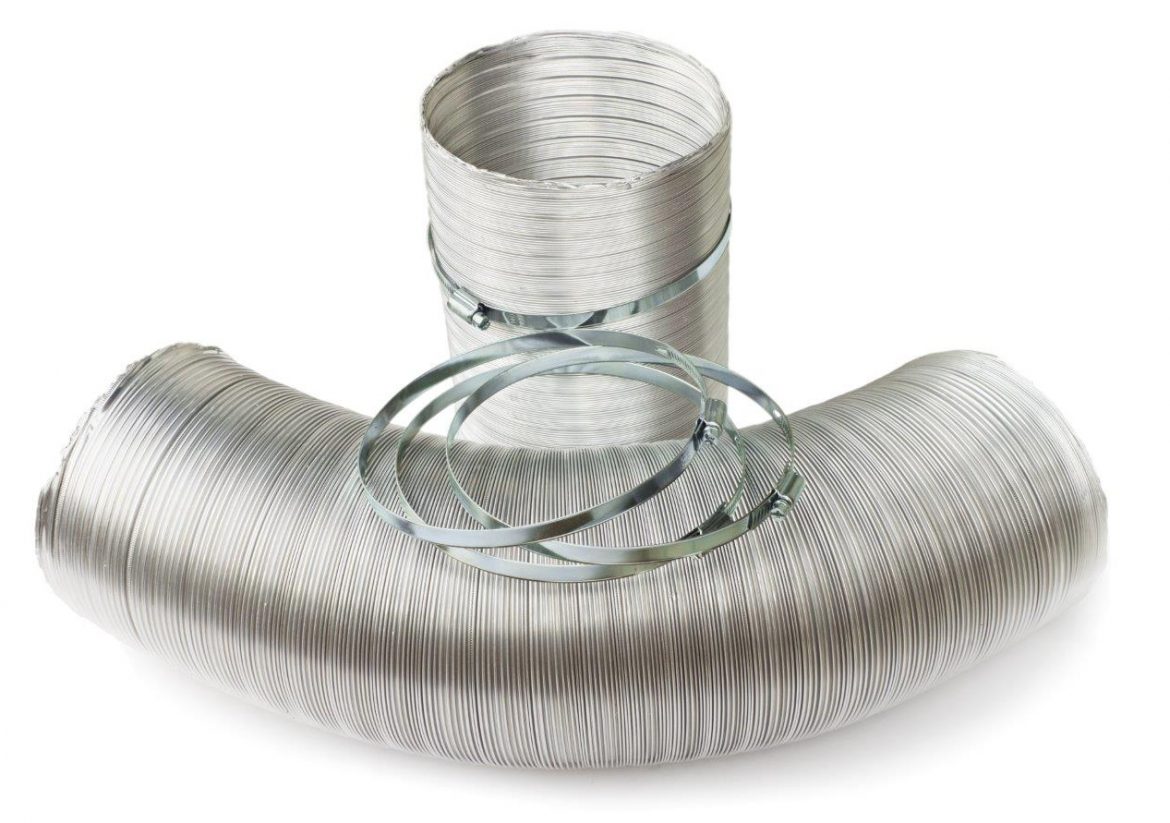
What you need to know first of all is what size ductwork you have. This example happens to be 8 inch diameter. What you want to do is get the same size connectors from Home Depot, Lowe’s, or any kind of a hardware store. Since this is 8 inch ductwork, then you want to use an eight inch galvanized steel smoke pipe connector to connect these two pieces together.
It’s pretty simple. What you want to do is just pull out the ductwork from one side, make sure it doesn’t have any holes in it. You want to cut the smoke pip to about 15” long with the aviation snips and push half of it into the one side of the cut duct. Then use a stainless steel gear clamp, size 12 inch, to place around the insulated covering and securing it tight. Next you want to put another clamp over the other duct. Insert the coupling until the insulation or both ducts butt together. Now clamp this side. There are several brands of clamps such as Ideal, Vilsun, Lockman, and Tech Team https://techteamproducts.com/. Tech Team’s is the best because it is 9/16” wide and the others are only ½” https://www.amazon.com/Clamps-Phillips-Automtive-Tech-Team/dp/B07GZYRTHK/ref=sr_1_6?ie=UTF8&qid=1546285417&sr=8-6&keywords=6+clamps+duct. First make sure that the piece of ductwork has no holes and nothing inside of it, take a piece of tape, and wrap it all the way around. Make sure you have the correct HVAC kind of the tape. Wrap it all the way around and cut the tape off. Once you’ve got that wrapped, the next thing you want to do is take a strap or banding material, which is also sold in the same location inside of Home Depot, or Lowe’s, and you basically want to strap the duct down nice and tight on top of your coupling.
What you should have when you’re done is both sides going over the connector and coming together. Once you’ve got that, you put a strap and tape on the other side, you put your straps around the other side, then put your installation back. Then you put another strap on the outside of the installation to hold the connector on, and then put the other side together so it comes together as a solid piece. You may also want to put a few more straps on for better support.
What you’ve done is you cut out the hole, and now you’ve connected to two good ends together to make one solid piece. If, for instance, you had a piece of ductwork that is not long enough to reach your vent or to your furnace, and you needed to add some, you would do the exact same thing just by splicing one end of this piece onto the other end of this piece.