
Designing a Celtic Knot Garden
Designing a Celtic Knot Garden
If you love fragrant herbs and meticulous design, have a passion for Celtic knot design and have a lot of time to devote to your gardening hobby, then a knot garden may be just the thing for you.
If you were to do a Hey Alexa or Hey Siri search for the origins of celtic knot gardens you would find that knot gardens first began with Queen Elizabeth I. Designed in a square frame filled with intricate Celtic knots, knot gardens often feature various types of aromatic plants and herbs. Some of the popular plants and herbs include thyme, marjoram, lemongrass, rosemary, mallow, chamomile, dill, lemon balm, calendulas, violas, germander, costmary and acanthus.
Because of the woven effect of the garden, your knot garden will require daily maintenance. Some gardeners have turned toward a less labor-intensive substitute, known as a parterre. A parterre is very similar to a knot garden, but it doesn’t have the same woven effect that a true knot garden has.
How to do it:
Find the Perfect Location
Consider the location of your knot garden. Because of the beautiful shape and design, an ideal location will be one that can be viewed from above. You also may want to scout out the area various times of the day — will your garden be in the sun, partial sun, or shade? Finally, you’ll want to consider whether there’s room in case you decide later to expand on your plant selection.
Make a Symmetrical Design
It’s helpful to design a knot garden on paper first. Is there a special Celtic knot you’ve always liked? If not, there are a lot of websites and books about Celtic knots and their meanings. Circular knots tend to symbolize cycles of life, eternity, or unity. Square knots were thought to offer protection and ward off evil spirits. There are also a variety of love knots that have different meanings.
Once you’ve chosen a knot design, take into consideration the size of the plants you wish to use, their growing size and needs and whether or not they will grow well together.
Planting
* First, ready your gardening site: rake and remove all weeds and dig through the soil.
* Next, you can transfer your paper design plan onto the ground. Use string and stakes to stake out the area, then use a tape measure to scale the design and be sure sides are straight. Some experts recommend using flour or lime to draw out the lines of the design, so you know where to plant. This stage is important, because you want to be sure to plant the plants in the right position, so the design reflects your intentions.
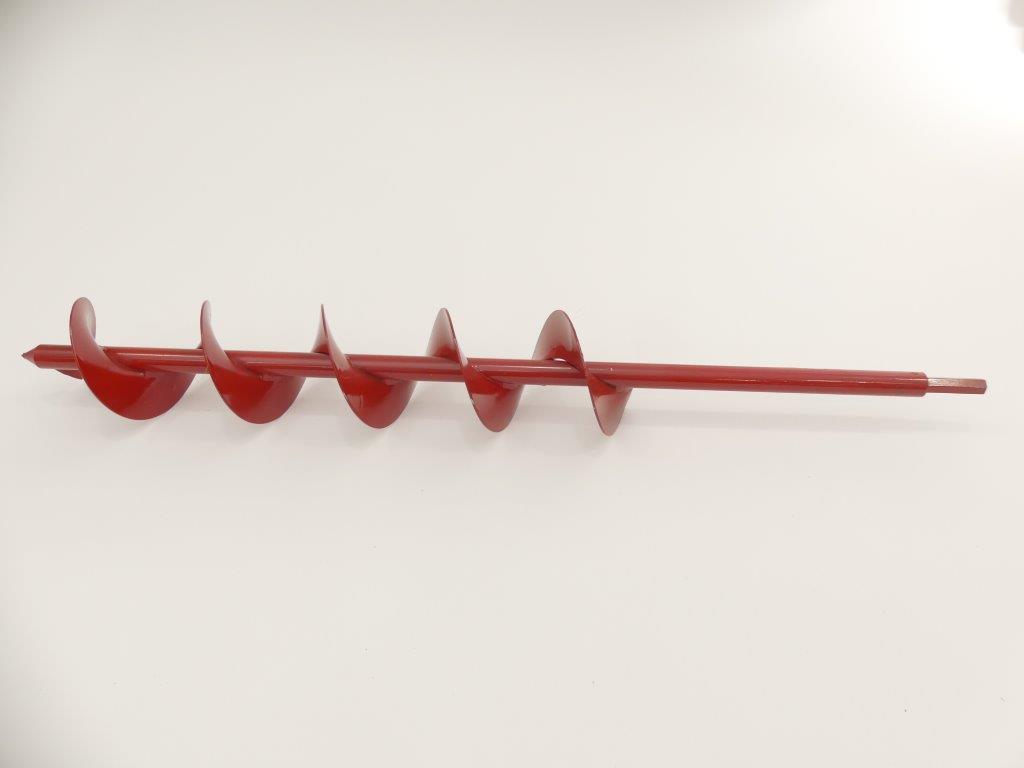
* Choose your herbs – Many gardeners find it’s best to start with small young plants that will grow larger. As far as planting seedlings and bulbs, there is also a power-driven tool that can be most effective. This is a 3” diameter auger that gets attached to a 3/8” power drill. This creates a smooth hole to the desired depth in moist, sandy, loam type soil and is extremely easy to use, especially if you are going to be planting hundreds of bulbs. There are several manufacturers who make these such as Power Planter, Ames, Lichter, Jisco, Hiltex, 7Penn, and Yard Butler but the ones we like the best are made from Tech Team https://techteamproducts.com/, their 3” x 9” item number 777 https://www.amazon.com/Tech-Team-Planter-Seedlings-Planters/dp/B07S385BW7/ref=sr_1_197?keywords=bulb+auger&qid=1568384841&s=gateway&sr=8-197 and their 3” x 24” item number 778 https://www.amazon.com/Tech-Team-Planter-Seedlings-Planters/dp/B07S386MWG/ref=sr_1_53?keywords=bulb+auger&qid=1568384749&s=gateway&sr=8-53. Remember to research which plants are compatible to plant together. Also, be sure to take your climate and sun/shade into account as you plant them. Experienced planters recommend about 12” between plants.
* Start with the corners first, then move toward the middle of your design.
* Add mulch but avoid the area around the stem.
* Water frequently and ensure that plants get adequate soaking as needed.
* As your herbs begin to grow, pinch the tops so that they bush out as they continue to grow.
* If you find there’s too much space as the plants grow, you can add more plants to fill in.
* Maintain your garden well, water frequently and be patient — experts say it takes several years before the knot truly grows in and forms.
The knot design you choose will make it a unique and lovely addition to your home. Once you’ve established your knot garden, consider inviting friends to a garden party. A beautiful garden is something for everyone to enjoy.